


How to Make a Tin Can Candle Lamp Step by Step

How to make a decorative lamp using a recycled tin can and a candle
Creating a decorative lamp with a tin can and a candle is an original, low-cost DIY project and a great way to reuse materials. Below, we explain how to do it step by step, achieving a striking result with a simple but precise process.
Materials and tools needed
- 🛠️ Gather the basic materials
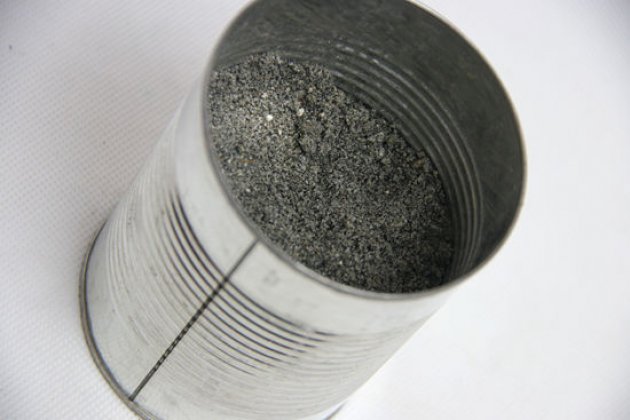
Before you start, make sure you have an empty, clean tin can with the paper label completely removed. You will also need sand, a small candle, metal spray paint, nails, a hammer, and a sheet of paper to use as a template.
How to make the lamp step by step
- 🪣 Fill the can with sand and water
First, fill the tin can with sand, leaving a few centimeters free at the top. Then add water until the sand is completely covered.
- ❄️ Freeze the can to harden the surface
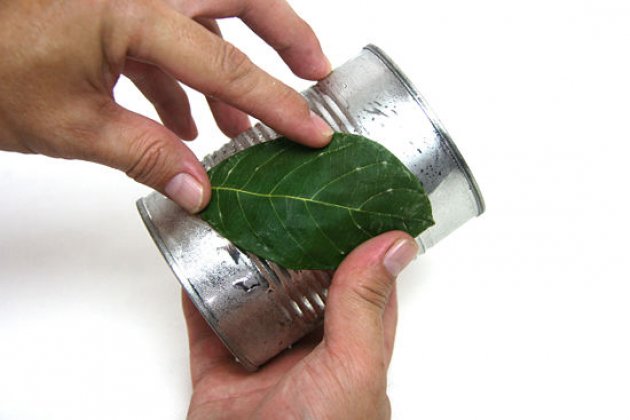
Next, place the can in the freezer and leave it for at least 24 hours until the contents are completely frozen. This creates a solid surface that makes it easier to punch holes without deforming the metal. - 📄 Attach the template and punch the design
Then tape the paper template onto the can. Carefully punch the holes following the chosen pattern, using nails and a hammer.
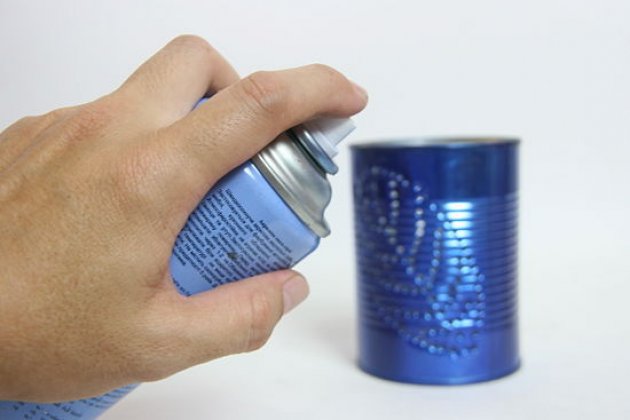
- 🎨 Paint the can with metal spray paint
Once the holes are finished, paint the entire surface of the can using spray paint designed for metal. Apply thin coats and allow them to dry completely.
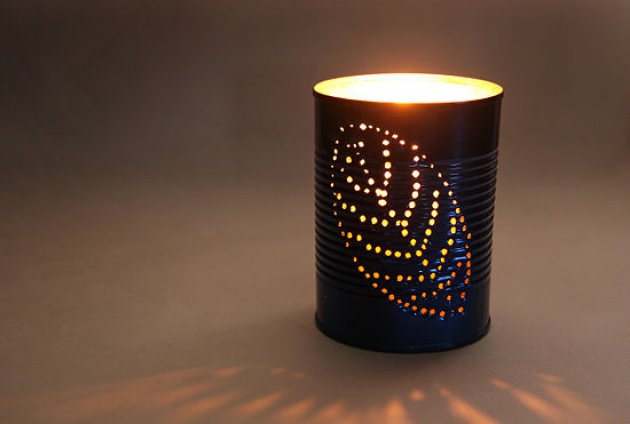
- 🕯️ Place the candle and light the lamp
Finally, place a small candle inside the can. When lit, the light shines through the holes, creating a very attractive decorative effect.
DIY project summary
| Aspect | Detail |
|---|---|
| Difficulty | High |
| Time required | 1 day (intermittent work) |
| Main material | Recycled tin can |
| Lighting type | Candle |
| Recommended use | Indoor or outdoor decoration |
This DIY project is a good example of creative reuse. If you want to explore similar ideas, you can check other projects using the Vilssa search engine or browse more decoration and DIY content on our website.
The process described is based on the original tutorial published on WikiHow.
Content written by the editorial team at decoracion.vilssa.
Publicaciones relacionadas:
 How to Measure on a Floor Plan: A Practical Step-by-Step Guide
 Types of Wallpaper and How to Apply It Step by Step
 How to Make Plaster Masks Step by Step – Easy DIY Craft for Kids
 How to Make Homemade Christmas Balls Step by Step
 How to Make a Christmas Wreath with Clothespins Step by Step
 How to repair a parquet floor: practical step-by-step guide