


Construction of Reinforced Concrete Slabs: Joints, Pouring and Curing
Construction of reinforced concrete slabs: joints, pouring and curing
(From Part 1: Reinforced concrete slabs)
Introduction. As explained in the previous article, reinforced concrete slabs are a key element in ensuring building health and durability. They help prevent damp problems, heat loss and damage to the perimeter structure. Below, we describe the final stages of their correct execution.
e. Joints in reinforced concrete slabs
Joints are essential to absorb movements and avoid internal stresses in the slab. Four main types are used:
- 🧱 Isolation joints
- 🧩 Construction joints
- ↔️ Contraction joints
- 🌡️ Expansion joints

Isolation joints
Isolation joints separate the slab from fixed building elements such as walls, columns, inspection chambers or manholes, preventing stresses caused by restrained movement.
- Typical thickness: 10–20 mm
- Material: compressible (e.g. expanded polystyrene)
At column bases, a compressible material of at least 25 mm thickness should be placed in slabs without final finish. If the floor finish is applied later, a perimeter void (diamond, square or circular shape) should be left to complete concreting after placing the joint material.
Construction joints
Construction joints divide the slab into panels poured at different times. They can be executed with flat faces or tongue-and-groove profiles.
Execution recommendations:
- 📐 Use perfectly squared formwork
- 🔨 Proper compaction of concrete next to the formwork
- 🎯 Careful finishing of slab edges
- 📏 Accurate levelling between adjacent slabs
If concreting must be interrupted unexpectedly, one of the following solutions should be adopted:
- Remove the fresh concrete up to the nearest planned construction joint
- Create a construction joint with starter bars to ensure continuity
Construction joints should always be located within the central third of the distance between contraction joints.
Contraction joints
Contraction joints allow horizontal movement of slab panels and reduce stresses caused by drying shrinkage and temperature variations.
- Saw-cut depth: 1/4 to 1/3 of the slab thickness
- Typical spacing: 4–6 m (25–30 times the slab thickness)
- Outdoor slabs: spacing less than 4 m
Expansion joints
Expansion joints are placed every 20–30 m and must always coincide with the structural joints of the building.
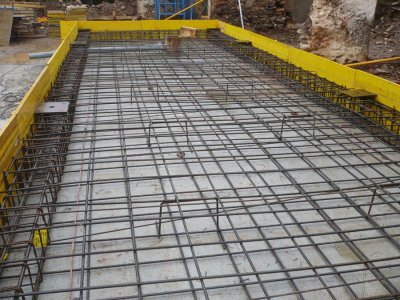
f. Concrete pouring and compaction
The slab is poured in panels, following a checkerboard pattern. Concrete strength must comply with project specifications.
- Consistency: plastic (slump 3–5 cm ±1 cm)
- Maximum aggregate size: 40 mm
- Coarse aggregate fractions: 5–12, 12–25 and 25–40 mm
- Sand equivalent > 80
Compaction is carried out by vibration. Concreting must be stopped if aggregate segregation occurs.
The surface is finished by screeding. Local irregularities greater than 3 mm under a 3 m straightedge are not permitted. Final slab thickness must match the project design, with tolerances of −1 cm / +1.5 cm.
g. Concrete curing
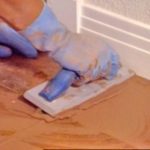
Curing is carried out using specific curing compounds that form a surface membrane to retain moisture. These products are applied by spraying or rolling.
Alternatively, polyethylene sheets with a minimum thickness of 0.1 mm may be used, placed while the surface is still damp and overlapped by 45 cm.
Wet curing methods require explicit approval from the Site Management, as they are generally less effective than the methods described above.
h. Protection of the finished slab
- 🚧 No machinery traffic is allowed on the slab during the first 3 days
- 🛡️ If the slab includes the final finish, it must be protected with a polyethylene sheet and a 4–5 cm layer of sand
Article published by the Vilssa editorial team · Construction and renovation.