


How to fix tile grout joints

How to fix tile grout joints: cleaning and repair step by step
Knowing how to fix tile grout joints is essential to keep bathrooms and kitchens in good condition.
Over time, grout joints can become dirty, deteriorated or even disappear completely, which affects not only the appearance
but also the hygiene of the space.
When grout joints are damaged, small insects may come out from inside the wall.
They are not harmful to health, but they can be annoying and create a feeling of poor cleanliness.
For this reason, it is important to act in time, either by cleaning or properly repairing the joints.
The process of filling the joints between tiles is known as grouting.
This is done using grout, a cement-based material designed to seal and protect tile joints.
You can find more technical information about this material on
Wikipedia.
It is advisable to renew grout joints periodically, as frequent cleaning erodes the grout
and eventually removes it completely.
🧼 How to clean tile grout joints
Basic cleaning tips
🟢 1. Avoid sandpaper and metal scourers
Although they may seem effective, they scratch the tile glaze and remove the grout.
It is best to start with a cloth dampened with water or use a toothbrush.
 |
| Using a toothbrush to clean tile grout joints |
🟢 2. Water and soap
If the grout is not very dirty, water and soap are enough.
Regular cleaning helps keep the joints in good condition for many years.
🟡 3. Vinegar diluted in water
When dirt persists, diluted vinegar can be used.
Keep in mind that grout is water-soluble, so each cleaning softens the joint.
🟠 4. Muriatic acid (hydrochloric acid)
This is an effective solution for very dirty grout joints, but it must be used with extreme caution.
It is mandatory to wear gloves and a mask and avoid contact with painted wood and metals,
as the acid corrodes these materials. It does not damage tile glazing, but it dissolves cement and grout.
🟠 5. Cleaning wall tiles
On vertical tiles, the acid must be applied with a damp cloth, repeating the process several times.
It is more laborious than cleaning floors, but it restores the original appearance of the grout.
🔴 6. Do not seal grout with silicone
Silicone prevents tile breathability and can cause condensation between the tile and the substrate.

🛠️ How to repair and replace tile grout joints
If cleaning is not sufficient and the dirt is deeply embedded, it will be necessary to remove the old grout and regrout the tiles.
1. Removing damaged grout
Use a thin punch or a flat-head screwdriver to remove all grout residue between the tiles.
2. Surface cleaning
Make sure the surface is completely clean before applying new grout.
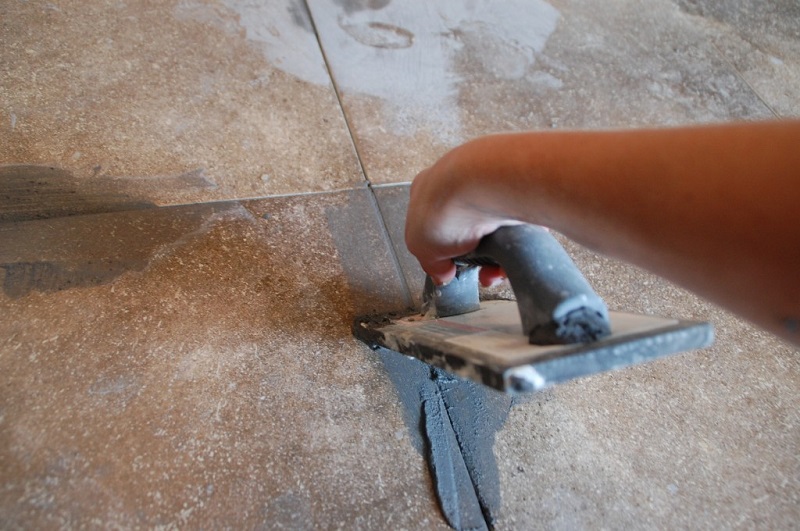
3. Grouting methods
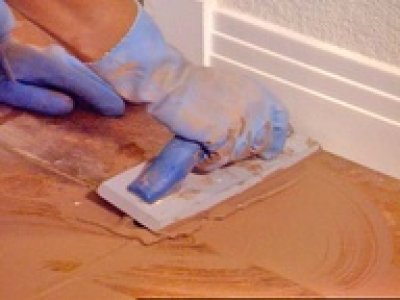
Option 1: Grouting the entire surface
The grout is applied with a trowel or float, and the excess is removed with damp cloths or natural fiber pads.
 |
| Using cement-based grout to fill tile joints |
Option 2: Manual joint sealing
This method consists of filling the joints gradually using a small spatula or even a finger.
It is a cleaner, slower and more economical method, ideal for people without experience.
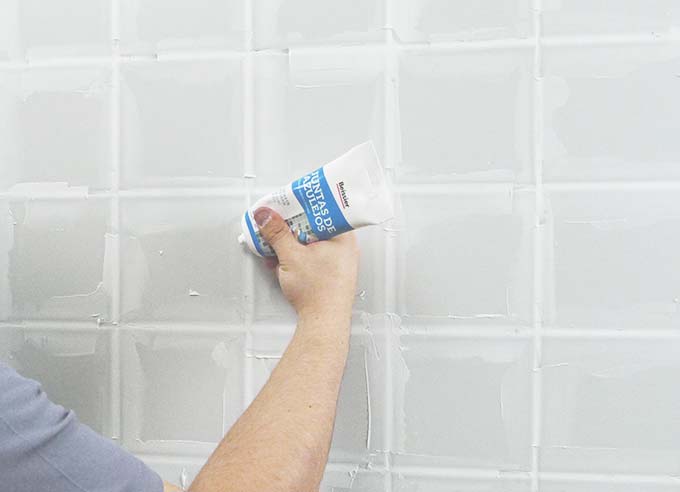 |
| Ready-to-use paste for repairing tile grout joints |
Professionals usually use grout sold in large bags mixed with water,
but for home repairs it is more advisable to use
ready-to-use grout paste in small quantities,
which is easier to apply and control.
📊 Summary table: cleaning and repairing tile grout
| Situation | Recommended method | Notes |
|---|---|---|
| Lightly dirty grout | Water and soap | Regular maintenance |
| Persistent dirt | Vinegar or muriatic acid | Use protective equipment |
| Deteriorated grout | Remove and regrout | Use grout or grout paste |
Publicaciones relacionadas:
 How to fix the tile joints
 How to Measure on a Floor Plan: A Practical Step-by-Step Guide
 Can We Live Without Oil? Future Energy Alternatives and Sustainable Substitutes
 Basin types: materials, installation styles and price guide
 How to repair a parquet floor: practical step-by-step guide
 Types of threads for sewing or knitting