Transform your bathroom with vinyl flooring: easy, beautiful, and affordable

Many times I’ve wondered how to give my bathroom or kitchen a fresh new look, mostly to change the atmosphere and update the decoration. Seeing the same thing day after day can feel monotonous and boring. But I quickly realize that I don’t have the money—or the desire—to start a big renovation just to change the appearance of my bathroom.

A very practical, affordable, and simple solution is to install vinyl flooring. Why? Here we explain the main advantages and how you can install it yourself.
1. Easy to install: vinyl flooring is simple to lay, even for beginners.
2. Clean and affordable: it’s inexpensive and easy to replace in a couple of years if you want to refresh your space again.
3. Wide variety of styles: there are countless options that mimic wood, stone, or ceramic, with different colors and textures. Check out more ideas about types of materials and wooden floors in this Vilssa article.
4. Waterproof and durable: vinyl is perfect for bathrooms and kitchens, replacing ceramic tiles at a much lower cost.
If you want, you can install it yourself. How? Follow these simple steps.

Before buying the material, you should decide on a few key things:
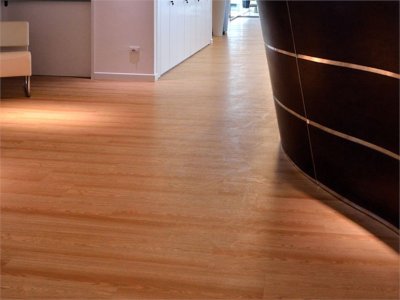
1. Choose the right type of vinyl: it can come in rolls or tiles. Tile formats are usually easier to install. If you want a wood-like look, go for rectangular planks to imitate natural boards.
In the case of tiles, pay special attention to the joints to achieve a clean, professional finish.

2. Install it over the existing floor: as long as the surface is smooth, firm, and not textile or carpet. Ideally, you’d glue the vinyl to the base surface, but it’s not strictly necessary if the current floor is in good condition.
Materials needed to install vinyl flooring
To install vinyl flooring yourself, you’ll need the following basic materials:
1. Vinyl tiles or planks: either self-adhesive or those that require contact adhesive.
2. Contact adhesive: only if you’re using non-self-adhesive tiles.
3. Utility knife or cutter: for precise cuts.
4. Metal ruler or square: to make straight cuts and accurate measurements.

Step-by-step vinyl floor installation process
Let’s assume you’re installing vinyl flooring with adhesive (not self-adhesive). Follow these steps for a professional result:
1. Lay out the entire floor before starting. Arrange the tiles provisionally to decide the best layout and avoid unnecessary cuts or very thin pieces near the walls.
2. Clean the surface thoroughly. Remove any dust, grease, or debris from the old floor. A clean surface ensures good adhesion.
3. Install the tiles one by one. Follow the manufacturer’s instructions regarding drying times and adhesive use. Start in a visible corner (for example, the one you see when entering the bathroom or kitchen) and continue like a puzzle.
4. Adjust the tiles along the walls. Place one tile on top of the last installed piece, mark the cutting line with a pencil, and cut. This method is more precise than measuring with a ruler.
5. Pay attention to corners and curved cuts. Focus on edges, shower trays, and fixtures. For curved cuts, use a cardboard template: trace the shape and transfer it to the vinyl. This way you’ll avoid mistakes and material waste.
If you’re interested in more bathroom renovation ideas, check out bathroom remodeling tips and ideas on Vilssa.
Photo source: http://www.liuni.com


