


How to Paint Over a Varnished Surface: Stripping Methods
How to paint over a varnished surface using proper stripping techniques
To paint over a varnished surface, it is essential to prepare the substrate correctly.
When an existing layer of varnish, oil-based enamel, or polyurethane lacquer is present, the new paint — especially water-based paint —
will not adhere properly without an appropriate stripping process.
For more details, you can also consult our page on
surface preparation and painting.
When should you strip before painting over a varnished surface?
There are two main situations:
- 🟧 The previous finish is varnish or oil-based paint and you want to apply water-based paint.
In this case, the new paint will slide off unless the previous layer is removed or opened.
The substrate must be thoroughly sanded or fully stripped to ensure good adhesion.
You can also find related topics in our
woodworking section. - 🟩 The previous finish is varnish, enamel, or non-water-soluble paint and the new product is similar.
In this case, you can paint directly as long as the existing layer is in good condition.
For more guidance on coatings, visit our
painting articles.
Stripping: a key step before painting over a varnished surface
Stripping involves removing the existing topcoat to allow the application of a new finish.
It is required when the surface is damaged or when you need to paint over a varnished surface that is too impermeable.
How is stripping done?
Most stripping processes begin by applying a stripping product that softens and loosens the varnish.
It is then scrubbed with abrasive pads or sandpaper to improve adhesion and remove residues.
Before starting, it is highly recommended to clean and degrease the surface, as advised by Sika in its coating removal procedure:
see Sika reference.
This prevents grease and dust from interfering with the stripper’s action.

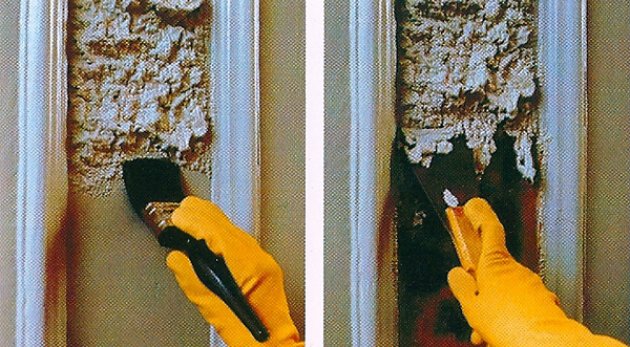
|
| Chemical strippers are thick pastes applied with a brush |
Types of stripping
🧪 Chemical strippers
They are effective but expensive for large surfaces. They require a sufficient dwell time:
if removed too soon, the process must be repeated.
Two main types exist:
- Liquid products applied with a brush, removed once the paint blisters.
- Thick pastes, particularly useful for mouldings and detailed areas.
After use, the product must be neutralised according to manufacturer instructions, usually with water or water mixed with vinegar.
For large elements such as doors or window frames, specialised companies may use caustic soda baths,
although these can cause discolouration or damage to joints.
To explore more topics related to wood restoration, see
our wood-related articles.

|
| Chemical stripper applied with a brush |
🔥 Heat-based stripping
Heat softens many paints, making them easier to remove with a scraper. However, several precautions are necessary:
- Avoid overheating — the paint may ignite.
- Do not use newspaper on the floor to collect hot residue.
- Wear eye and hand protection and keep a bucket of water nearby.
- Prefer heat guns to gas torches, which are more dangerous.
Heat can char wood or crack glass, so it must be applied with care.
You can browse related DIY topics in our
DIY section.
After stripping: inspection and finishing
Once the old coating has been removed, you must:
- Check for remaining residues and remove them.
- Repair small defects or open pores before priming or varnishing.
- Lightly sand the surface to improve final adhesion.
This step is essential to avoid adhesion failures, especially when combining chemical and mechanical methods.
Summary table
| Situation | Recommended method | Important notes |
|---|---|---|
| Switching from oil-based varnish to water-based paint | Deep sanding or complete stripping | Water-based paint does not adhere to impervious varnishes |
| Re-varnishing with a similar product | Paint directly if the layer is in good condition | Avoid excessive layers that prevent breathing |
| Removing deteriorated varnish | Chemical stripper or heat | Neutralise the product and use proper protection |
| Surfaces with multiple layers | Combination: chemical stripper + sanding | More effective and uniform finish (Sika recommendation) |
Publicaciones relacionadas:
 Comment peindre sur une surface vernie : méthodes de décapage et préparation du support
 How to Measure on a Floor Plan: A Practical Step-by-Step Guide
 Can We Live Without Oil? Future Energy Alternatives and Sustainable Substitutes
 Basin types: materials, installation styles and price guide
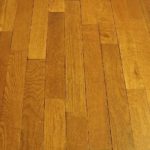 How to repair a parquet floor: practical step-by-step guide
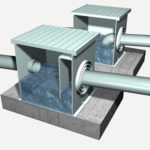 What a siphonic inspection chamber is used for