🧶 Gather all necessary materials. Prepare a ball of yarn in your preferred color, white glue, water, a few toothpicks, and a smooth work surface. For more Christmas DIY inspiration, explore projects like these Christmas trees made with pastry paper.
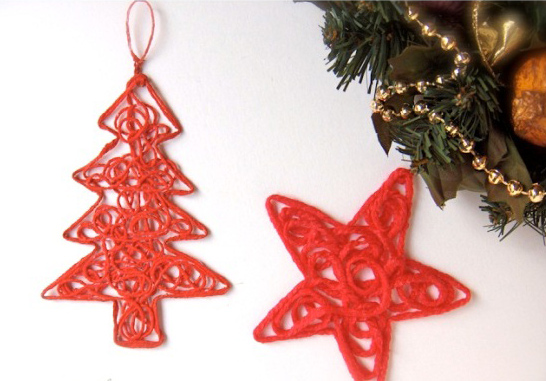
🎨 Draw the shape you want to create. Decide whether you want a star, a tree, or any other Christmas shape. Draw the outline on a clean, flat surface to use as your guide.
🧪 Prepare the glue mixture. Mix white glue and water in a container until you get a smooth liquid—not too thick but not too watery—so the yarn will harden properly once dry.
🪢 Soak the yarn thoroughly. Submerge the yarn into the glue-and-water mixture until it is fully saturated. To learn more about yarn as a material, you can check this external reference: Wikipedia – Lana.
✨ Shape the figure using toothpicks. Place the soaked yarn along the outline you drew, guiding and adjusting it with toothpicks so it maintains the exact shape of the figure.
⏳ Let the figure dry for a full day. After shaping it, leave the yarn figure to dry for 24 hours. Once stiff, it becomes a durable and decorative Christmas ornament.
🎄 Decorate your home with your new yarn pieces. Hang them on the tree, use them in garlands, or combine them with other DIY Christmas decorations such as plastic mesh Christmas trees. You can also find more ideas in the Vilssa Christmas search tool.


 How to Make Homemade Christmas Balls Step by Step
 How to Make Plaster Masks Step by Step – Easy DIY Craft for Kids
 Types of Wallpaper and How to Apply It Step by Step
 How to Measure on a Floor Plan: A Practical Step-by-Step Guide
 How to Make Recycled Newspaper Bags Step by Step
 How to Reuse Light Bulbs for Decoration Step by Step